 Grainy
How to Make a Retro Photo Collage With a Different Filter in Every Cell
A photo collage usually means four photos and one filter. Grainy's collage mode shoots each frame live with whatever preset you choose, so every cell can have its own look, then joins them into one 3:4 picture. Here is how to make one, and how to make it look good.
Why shoot a collage in camera
Collages are everywhere: the four-frame photo booth strip, the nine-square grid of a trip, the before-and-after pair. Usually they are made afterwards, by dragging photos into a template app. That works, but it has a cost. You have to choose the photos, crop each one, fix the colours so they match, and you often end up with a layout full of shots that were never meant to sit together.
Shooting the collage in the camera turns it around. You choose the layout first, and then you shoot each cell for its place in the frame. A wide shot for the big cell, a detail for the small one, a face, a hand, a sign. The result feels designed rather than assembled, a little like a photo booth strip or a contact sheet, and it is finished the moment you take the last frame.
Grainy's Collage mode does exactly that, with a twist: each cell can have its own preset.
The ten layouts
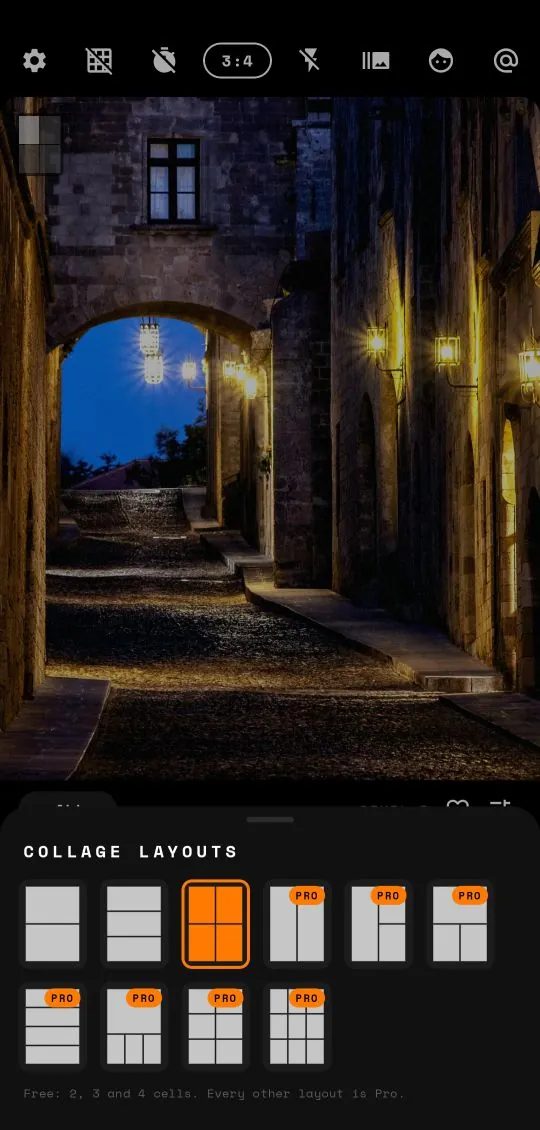
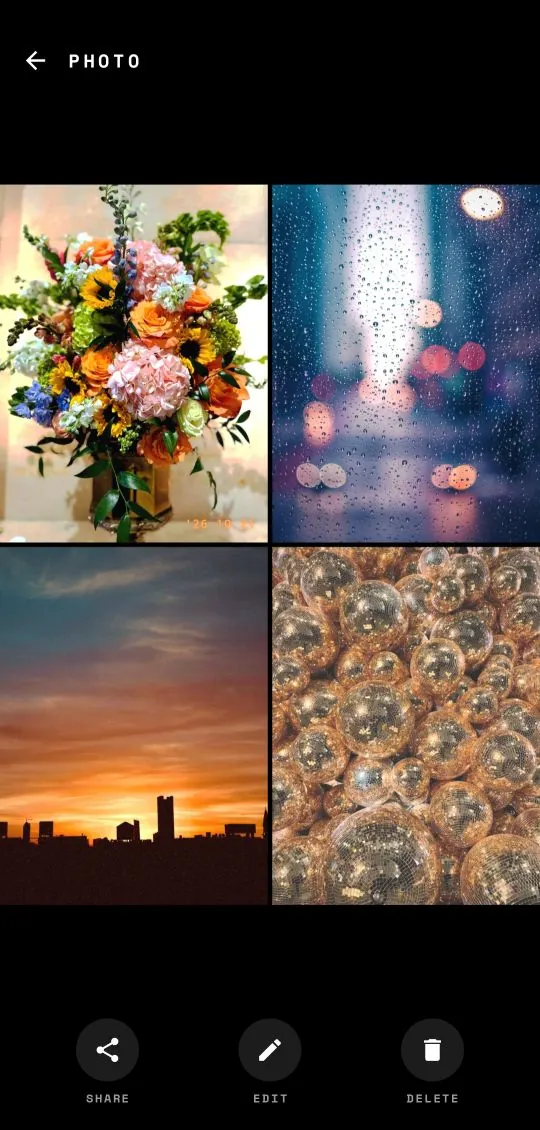
Every collage is saved as a single 3:4 portrait picture, 1,440 by 1,920 pixels, with thin black lines between the cells. There are ten layouts:
- Two stacked (free): two wide frames, one above the other. Perfect for before and after, or two moments side by side in time.
- Three stacked (free): three wide strips. Great for a sequence.
- Four grid (free): two by two. The default and the most versatile.
- Two side by side (Pro): two tall frames, ideal for portraits and outfits.
- One tall and two (Pro): a tall frame on the left, two smaller ones on the right.
- One wide and two (Pro): a wide frame on top, two below.
- Four strip (Pro): four thin frames stacked like a photo booth strip.
- One big and three (Pro): a large hero frame with three small ones underneath.
- Six grid (Pro): two by three.
- Nine grid (Pro): three by three, for a whole day or trip in one picture.
How to shoot a collage, step by step
- Choose Collage in the mode row under the preset strip. A short message reminds you that you can switch presets between frames.
- Pick a layout. Tap Collage again to open the Collage layouts panel, and choose one. Grainy remembers your last layout next time.
- Shoot the first cell. Press the shutter. The shutter button now shows your progress, for example 1/4, and a small map in the corner of the viewfinder shows which cell is next.
- Change preset if you want, by swiping the viewfinder or tapping the strip, then shoot the next cell.
- Keep going until every cell is filled. After the last one, Grainy assembles the collage and saves it to
Pictures/Grainy.
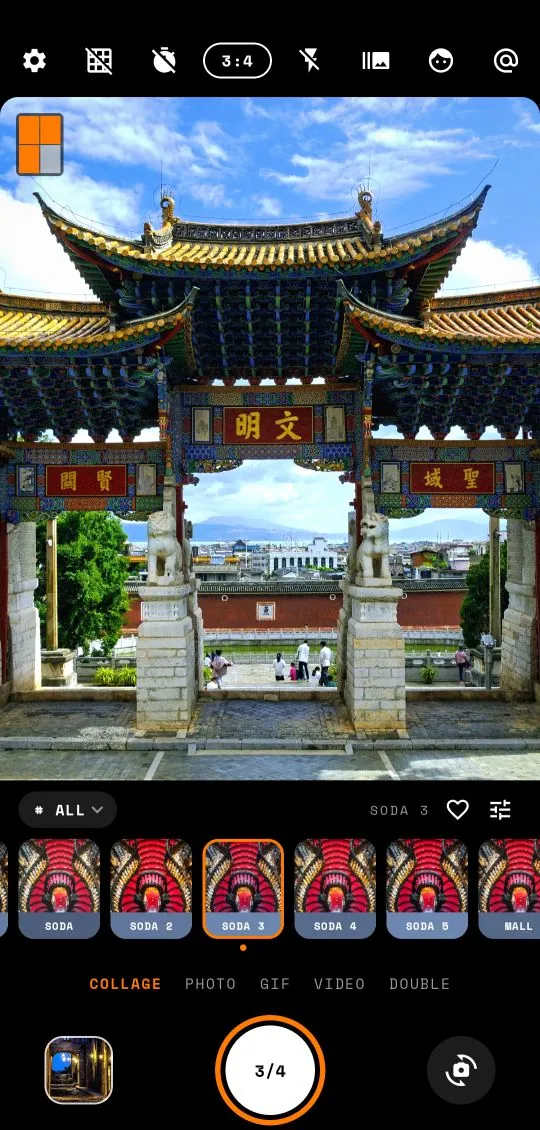
Cells are filled in reading order: left to right, top to bottom. Each photo is centre-cropped to fit its cell, so keep your subject near the middle of the viewfinder.
Changed your mind halfway? Press Back and the frames you have shot so far are cleared, so you can start the collage again. Switching to a different layout also starts over.
A different preset in every cell
This is what makes Grainy's collages different from a template. Because each cell is shot with whatever preset is active at that moment, you can deliberately mix looks inside one picture. Some ideas:
- One scene, four looks. Shoot the same view four times with a Digicam, a Faded, a Cinematic and a Black and white preset. It is a beautiful way to show a place, and a handy way to compare presets.
- Colour and mono. Alternate a colour preset and its Black and white neighbour across the grid for a checkerboard effect.
- Time of day. Warm for the morning cell, Clean for midday, Cine for sunset and CCD with flash for the night.
- One look throughout. Of course, you can keep one preset for every cell. That gives the most cohesive result, like a roll of the same film.
Free and Pro presets can be mixed, but if any cell is shot with a Pro preset on the free version, Grainy asks you to upgrade at that cell instead of taking it. You can always try a Pro look live before deciding.
Collage ideas that always work
The photo booth strip
Use the four-strip layout (Pro), set the timer to 3 seconds, prop the phone up and pull four faces. Change pose between frames. Add a CCD preset and the flash for the full booth effect.
The day in four
The four grid, shot across a whole day: breakfast, the street, the view, the night. A collage like this often says more than a ten-photo carousel.
The detail study
One subject, shot in close-ups: a café's cup, sign, window and menu; a bike's wheel, bell, saddle and basket. One big and three is ideal: the whole thing in the hero cell, the details below.
Before and after
Two stacked: a haircut, a room makeover, a plate before and after dinner, a sky before and after the storm.
Outfit check
Two side by side (Pro) for front and back, or the four strip for a full outfit and three details.
The trip grid
The nine grid (Pro) is a whole trip in one picture: the ticket, the window seat, the first view, food, a sign in another language, a friend, the hotel, the sunset, the way home.
Composing for small cells
A cell in a nine grid is a small picture. What works full screen does not always work at that size.
- Simplify. One subject per cell. Busy scenes turn to mush at small sizes.
- Get closer. Fill the cell with the subject rather than leaving it small in the middle.
- Keep the subject central. Each photo is cropped from the centre to fit its cell, so edges may be lost, especially in the strip layouts.
- Vary the scale. Mix a wide shot, a medium shot and a close-up. A grid of only wide shots looks flat.
- Use the grid guide. Turn on the grid from the top bar to keep horizons straight from cell to cell, so the collage looks tidy.
- Watch the light. If cells are shot in very different light, a shared preset will help them belong together.
- Lower the vignette. With Pro, turning the vignette down stops every cell having its own dark corners.
Planning a collage before you press the shutter
The best in-camera collages are planned, even if only for ten seconds. Before the first frame, ask yourself three questions.
What is the story?
A collage reads like a tiny comic strip. Decide what it says: "a morning at the market", "my friend's birthday", "the same street, four looks". If you cannot say it in a few words, the cells will feel random.
Which cell is the hero?
In layouts with a big cell, such as one big and three, one wide and two or one tall and two, the big cell carries the picture. Shoot it with your strongest scene and keep the smaller cells for details. In even grids every cell is equal, so balance is more important: alternate busy and simple cells, and light and dark ones.
What order will you shoot in?
Cells fill in reading order, so plan your route. If the top left cell is the wide shot of the market and the bottom right is the last coffee, shoot them in that order. The small map in the corner of the viewfinder always shows which cell comes next.
Troubleshooting
- A subject was cut off. Cells are centre-cropped, more so in long thin cells. Step back a little and keep the subject in the middle.
- One cell is much darker. Raise the exposure in the adjust panel for that frame before you take it. It is free.
- You made a mistake halfway. Press Back to clear the frames and start over. There is no way to reshoot one cell, which keeps collages honest, like a strip from a real photo booth.
After you shoot
The finished collage lands in your phone's gallery and in Grainy's own gallery, with no watermark. Open it from the gallery thumbnail to share it directly, or delete it and try again.
Collages are perfect as the first or last slide of a photo dump: a summary of everything that follows, or a closing card. They also pair nicely with a double exposure for a dreamier set, or with a short GIF to add movement.
If you are new to the app, the beginner's guide covers the rest of the camera.
Frequently asked questions
How many collage layouts does Grainy have?
10, from two cells to a nine-cell grid. Three layouts (2, 3 and 4 cells) are free, and the other seven come with Grainy Pro.
Can each collage cell have a different filter?
Yes. Collage frames are shot one at a time, so switch presets between frames and each cell keeps its own look.
What size is the finished collage?
1440 x 1920 pixels, in portrait 3:4, saved to Pictures/Grainy.
How do I start a collage over?
Press your phone's Back button while a collage is in progress. Grainy clears the frames shot so far and you can start again.